What you'll need:
- paper, pencil, scissors
- wood- I used 1/2 inch thick
- scroll saw
- dremel sanding tool
- paint- I used burnt umber and gold
- paint brush
Once you've cut the patterns out, you simply trace them onto your piece of wood.
Then, you cut them out with a scroll saw ( for bigger scale keys, a skill saw would work best). I bought a brand new scroll saw off craigslist for $75! It works so well for detailed projects like this!
Now you'll want to sand down the edges with your dremel so they are rounded and smooth. I also used my dremel to create depth in the key. It made them look more real!
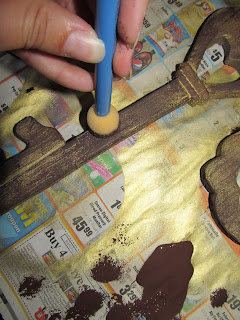
Next comes the paint! I put a coat of burnt umber on first. Then I sprayed some gold paint around areas like the crevices and on some edges. This doesn't have to be perfect! If you keep it a little bit uneven it will give the illusion of an old or antique key.
Now I took a sponge brush and applied a little more brown paint. Just make sure you don't let the brown seep into the crevices.
That's it! You can apply a spray on acrylic coat if you 'll be using them outside!
This project can be done at any scale if you have the tools!
If you're interested in purchasing these keys, click here! Or visit my
Etsy shop by clicking here! I'm happy to make keys to order!


No comments:
Post a Comment
I'd love to hear from you: