I needed a place to put my decorative gourds!
What you'll need:
* 1/8" pieces of wood
- 6 at 2.5" x 12"
- 4 at 2.5" x 6"
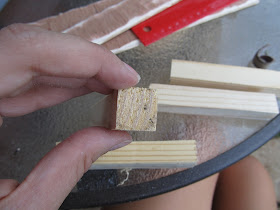
* 1" square posts
- 4 at 6 1/2" long
* a piece of 1/8" ply board
* dremel or sander
* paint
* stapler ( not a paper stapler, one for wood)
Start with your 1/8 inch pieces.
Use your Dremel tool to sand the edges.
Now take one of your 1/2 inch posts.
Attach,with staples, one of the 12" planks square and flush to the side top side.
Now attach a 12" plank to the bottom of the same post.
Allow the plank to over hang 1/8".
Attach a second post to the other side of the planks. Flush
with the top, 1/8" over hang on the bottom.
Staple a third plank diagonally across the others.
Repeat to make a second piece like this.
Connect the two sides by stapling a 6" plank on to
the posts.
Repeat on the other side.
Next, attach the last two 6" planks to the bottom ends of the posts.
Remember to leave the 1/8" over hang here as well.
Set the frame on top of an 1/8" piece of ply board and trace the interior
of the frame onto the board. Cut this out.
This piece should fit perfectly in the 1/8" overhang and be flush with
the side planks.
Dab some wood glue on the bottom of the posts.
Staple the bottom into place.
I painted my box with a water- paint mixture. It looks more worn
and vintage than paint alone.
Allow it to dry and fill with decorative gourds or pumpkins.


I will always follow your blog as i have seen you share awesome pic and info on your blog.
ReplyDeleteMDF Supplier | Veneered MDF