Friday, June 29, 2012

{ no-sew homemade american flag tank }

With the 4th of July right around the corner, here is a homemade tank 
for you to try out! Perfect for all the festivities you may be attending this 
Independance Day! 

What you'll need:

* white t-shirt
* scissors
* acrylic paint
* foam brush
* card board

Start by cutting your t-shirt! Simply cut around the neck line as low as you
like. Then cut off the sleeves. You may want to try it on before hand 
to mark where you want your new sleeve holes and neck line before cutting.


Now fit your shirt with some cardboard. Slip it in through the shirt to prevent
the paint from bleeding through to the back of your tank.
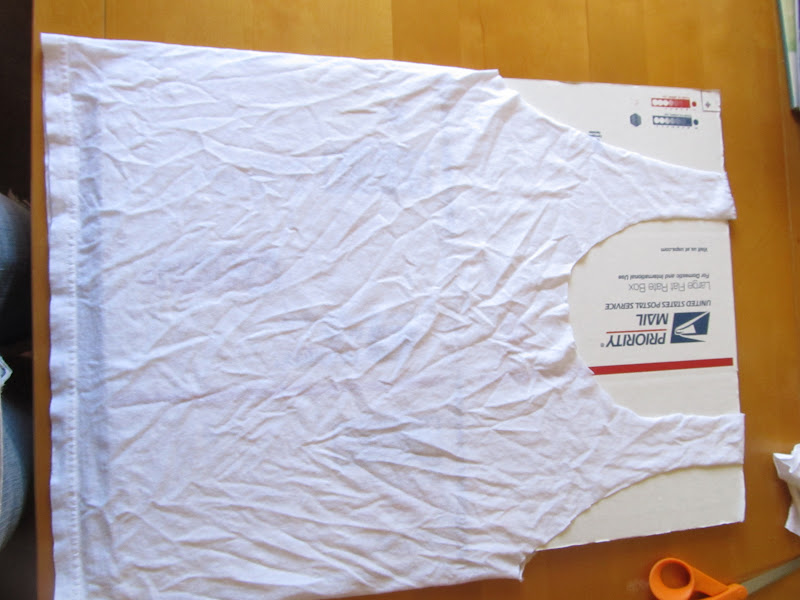

 Now start painting! I used red and turquoise. 


I started by outlining some
star shapes with the tip of my sponge brush. They don't have to be perfect.
If you prefer a more precise star, try using a stencil or some vinyl that can be
removed after painting.


Now paint your stripes. I just eyed these up. You can use wide tape
(like packing tape) to stencil in your stripes if you wish.

I wanted my flag tank to look "rocker", so I didn't worry about
perfection!

Allow the paint to dry completely before wearing. Don't wash for 24 hours
to allow the paint to set in. First wash and dry should be separate from any
other garments. After first wash and dry, the paint will be set in and you can throw
it in with your other laundry without worrying about bleeding or color transfer! 


This shirt is even cute turned inside out! :) It muted the colors
to compliment the actual flag!


Yep, I have pretty fun friends! <3


I made this shirt about 15 minutes before doing these photos! And.... it was free!
Enjoy

Saturday, June 9, 2012

{ barbie hair make-over } And giveaway winner

{Giveaway Winners}

Congratulations to the two winners of the little blue halos:

Tami Thomson
&
Jennifer Greg

Thanks for participating! If you left an email with your comment, I will contact you
via email. If not, please contact me within 48 hours to claim your halo through
my Facebook page or by email!

_____________________________________________________________________

Barbie hair make-over


Barbie is such a beauty! Silky smooth hair, big eyes, and don't forget 
the incredible wardrobe! But if you have a young girl, like I do, then Barbie's hair
is all but smooth and silky any more and and her clothes actually have to be 
washed with your laundry! 

So, Peach brought me a Barbie today and asked if I could tame her wild
mane. I was doubting my abilities momentarily. But I figured something out.. It's
not as hard as it seems! 


What you'll need:

* Liquid laundry soap (preferably with added fabric softener)
* Boiling water
* Cold water
* Cup

Sorry for the lack of pictures. 
If you can wash hair, you can fix Barbie!

Start by wetting Barbies hair.

Dip your finger tips in your liquid laundry soap and wipe through hair.

Brush soap through hair and remove all tangles.

Remove boiling water from any heat source. Dip Barbie's hair in the water and swish
it around a bit. Now pour the water over her hair slowly to remove soap.

Repeat above step in cold water.

Now brush the hair out and smooth it in place. Stand Barbie up in a cup to allow her
hair to dry completely.  


No more throwing Barbie's away for their nasty hair! :)

Friday, June 1, 2012

{ little blue halo } Giveaway

*This Giveaway Is Closed*
GIVEAWAY!!

I sat down and made a tie back halo for myself a few days ago.
It was just so cute that I went ahead a made a few more, and......
 I'm giving away 2 of them!* 
That's right, two winners! 


The giveaway will run for one week... from Friday, June 1, 2012
through Thursday, June 7, 2012 ( midnight, HST)

Halo's fit age Preemie to approximately 4 years old.

How to enter:

1. Like A Lott Of Ideas on Facebook.
Leave a comment on THIS blog post stating that you completed step 1. 
This comment will be your entry into this giveaway.
Additional ways to enter:
2. Pin this giveaway on Pinterest. Leave a comment on THIS blog post 
stating that you completed step 2.

3. Share this giveaway on Facebook. You must have a link 
back to this blog post
or A Lott Of Ideas Facebook page. Leave a comment on THIS 
blog post stating that you completed step 3

4. Follow A Lott Of Ideas blog through Google 
Friend Connect or by email. Leave a comment on THIS blog post stating
 that you completed step 4.

5. Go to Kandislei Co. on Etsy.com and find your favorite item.
 Leave a comment on THIS blog post stating what the item is and
 that you completed step 5.
Leave a comment on THIS blog post for EACH bonus entry completed stating that you completed the bonus entry and leave a link in your comment. You have 5 chances to win! Good LUCK!
*I will announce the winner on this blog as well as on Facebook.
Please check back to see if you won! Winners will be allowed 42 hours to claim
their prizes. After the 42 hours, a new winner will be chosen. If you
want to ensure your winnings, please leave an email address in your entry posts.
Winner will be chosen by Random.org.


Please note: This giveaway is NOT sponsored or associated with Facebook. There are no returns or exchanges on any of the prizes. Prizes do not have cash value.


Friday, May 25, 2012

{ pencil nameplate } teacher

The school year is over here in Hawaii! At the last minute my husband and I 
put together this nameplate for Ryker's teacher. Ms Arakaki was so wonderful!
She really dedicated herself to teaching her class and making sure that
everyone felt included and loved! What a wonderful woman!


What you'll need:

* 12" long 2x4
* Saw and sander
* Paint
* Vinyl lettering
* Jute and/ or yarn


My husband was wonderful and cut out and sanded the piece of wood for 
me! You need to cut the tip of the pencil  this shape >. Then, using a
sander ( belt sander is best) run the edge around the other end to define the eraser.


Go ahead and paint your pencil. Allow it to dry completely.

 I cut my vinyl lettering out on the Cricut. I used " Making
the Grade" Cartridge. I cut Ms. Arakaki at 1 1/2 inches. Ryker at 1 inch.

Center on your pencil and press it on.

Peel off the masking...

I put Ryker's name and the year on the bottom.

I finished off by tying some jute and textured yarn around the groove
that separates the eraser from the body of the pencil.


I wrapped a little bit of tissue paper around it.

This would be great  for a first day of school, teacher appreciation week,
or just because your child has a wonderful teacher! 


{ my heart in a jar }

My cousin pinned the cutest wedding decor idea on Pinterest the other day! 
Cute enough that I made a very similar version of it for my home decor! 
Thanks again Pinterest!

What you'll need:
* Canning jar
* 2 Book pages (or pattern paper)
* Strip of fabric
* Scissors

This is a very simple project!

Start by measuring both pieces of paper to your jar. I just set my
book pages inside and mark with a pencil about 1/8 of an inch lower than 
the top of the jar.

Cut off the excess

Sketch a heart in the center of your paper.

Cut out the heart and erase any pencil marks.

You need two pieces of paper so I just cut mine at the same time to make
sure they were the same.
Put your papers back into the jar; one in front, one in back. You 
should be able to see through both hearts.

Put the lid on and tie a strip of fabric around the top into a bow.
I like to rip my fabric instead of cutting it for that worn look.


That's it! Enjoy!


The version I saw on Pinterest had a candle in it. I do not recommend using a 
candle in my version. The paper could cause a fire hazard. 

Friday, May 18, 2012

{ cornflake candy } recipe

I've got a little recipe for all you peanut butter lovers! 
These peanut butter cornflake bars are chewy and not too sweet!
And, with only a few ingredients, it's nearly impossible to mess it up!
Even the kids can help!


Cornflake Candy

Ingredients:    
1 cup of sugar
                                  1 cup of light corn syrup (Karo brand)
                      1 cup of creamy peanut butter
     7 cups cornflakes

Start by measuring out your cornflakes. Set them aside

Mix sugar and light corn syrup in a large sauce pan over medium heat.

Make sure you keep mixing. The sugar will burn if you don't!

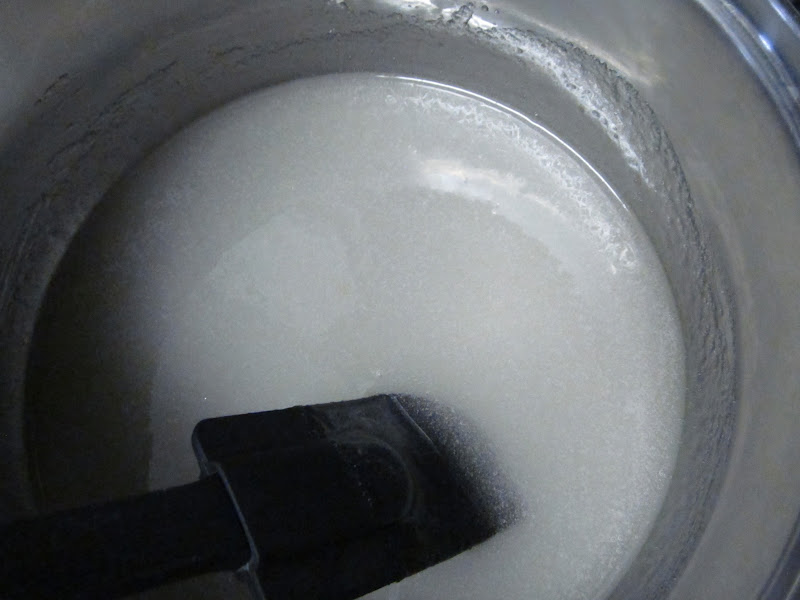
Boil sugar mixture until sugar had dissolved completely. Remove from heat

End product should be clear like so... 

Add peanut butter and mix well 


Add cornflakes to the peanut butter mixture, half cup at a time. I like
to just shake a little in the pot, mix, and repeat.

Make sure all of the cornflakes are coated. As it cools, it will harden.
So try to mix quickly and thoroughly 

Spoon mixture into a baking dish or onto a cookie sheet
lined with wax paper and press it flat to your desired thickness.

Let your Cornflake candy cool.
Cut into squares.

And eat!!