Friday, July 13, 2012

{ marshmallow gun }

It's always a challenge to find enough activities to keep school age
children occupied throughout the summer months! Eventually, all of the fun
things begin to get old and you find yourself with a child (and all of their friends) 
asking for advice on fun, new things to do with their time! Luckily for me,
I have a husband who loves to create things as much as I do! So, Jake
saved the day this time! Thank goodness! 


What you'll need:
* 1/2" PVC pipe (approx. 29 inches long)
* 2 - 1/2" "T" connectors
* 2 - 1/2" 90 degree connectors
* 2- 1/2" caps
* Pipe cutter
* Weld-On PVC glue
* Cotton swabs
* Disposable rags
* Spray paint
* Mini marshmallows

First you need to cut your PVC pipe into smaller pieces: 
1- 8" piece 
3- 4" pieces
1- 3" piece
2- 2 3/4" piece
Using the knob on the end of the cutter, you can loosen and 
tighten the pizza cutter like blade. Tighten onto the pipe and spin
it around. Tighten after each spin until the pipe is cut through.

Lay out your pieces to prep for gluing

Marking your pipes before gluing is the best way to ensure everything 
lines up straight. To mark them, assemble the marshmallow gun prior to gluing.
Using a pencil, mark at the joints ( vertically and horizontally ) and then match 
up these markings once you've glued. It is more difficult to make corrections
once the glue has been applied. 

Line these up when you put your pieces back together after gluing.

**This glue can be a real mess! Try very hard not to get it on your clothes
or anything else you don't want ruined. Lay down a disposable rag
or newspaper to work on. Work in a well ventilated area or outside to
avoid fumes.

My husband used a cotton swab instead of the large applicator that comes
 with the glue to avoid dripping as much as possible. Dip your cotton swab in the 
glue. Wipe a generous amount of glue around the outside edge of the pipe.

Moving quickly, wipe a generous amount of glue inside the fitting.

Now, fit the two together, lining up your markings. The glue grabs fast,
so move quickly to make adjustments easier. Use a disposable rag to wipe
any glue that has oozed out. Avoid getting it on your hands.

Continue gluing the pieces together as they are shown in the image above.

Now spray paint! We let my son paint his own (with help)! It turned out
very colorful! Allow the paint to dry over night.

Now gather some ammo 
(aka: mini marshmallows)

Place one mini marshmallow into the top chamber. 

Now blow bursts of air into the chamber. The marshmallow will
shoot out the barrel of the gun! Make sure you teach your child
not to inhale while they prepare to blow the marshmallow out to avoid 
the chance of sucking the marshmallow back into their mouth and possibly choking. 

The marshmallow gun was such a hit with our son's friends that my husband
is now on back order making them! The best part is that it cost a total of $5! 


Friday, June 29, 2012

{ no-sew homemade american flag tank }

With the 4th of July right around the corner, here is a homemade tank 
for you to try out! Perfect for all the festivities you may be attending this 
Independance Day! 

What you'll need:

* white t-shirt
* scissors
* acrylic paint
* foam brush
* card board

Start by cutting your t-shirt! Simply cut around the neck line as low as you
like. Then cut off the sleeves. You may want to try it on before hand 
to mark where you want your new sleeve holes and neck line before cutting.


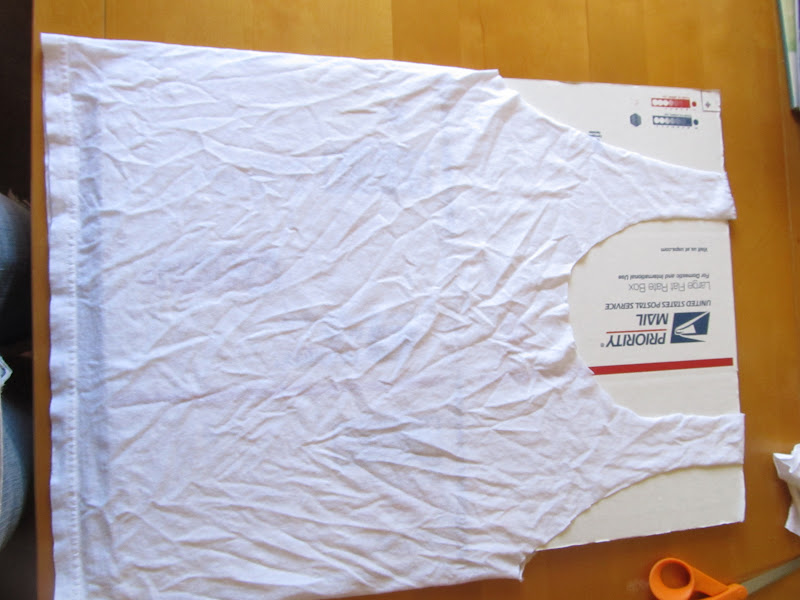
Now fit your shirt with some cardboard. Slip it in through the shirt to prevent
the paint from bleeding through to the back of your tank.


 Now start painting! I used red and turquoise. 


I started by outlining some
star shapes with the tip of my sponge brush. They don't have to be perfect.
If you prefer a more precise star, try using a stencil or some vinyl that can be
removed after painting.


Now paint your stripes. I just eyed these up. You can use wide tape
(like packing tape) to stencil in your stripes if you wish.

I wanted my flag tank to look "rocker", so I didn't worry about
perfection!

Allow the paint to dry completely before wearing. Don't wash for 24 hours
to allow the paint to set in. First wash and dry should be separate from any
other garments. After first wash and dry, the paint will be set in and you can throw
it in with your other laundry without worrying about bleeding or color transfer! 


This shirt is even cute turned inside out! :) It muted the colors
to compliment the actual flag!


Yep, I have pretty fun friends! <3


I made this shirt about 15 minutes before doing these photos! And.... it was free!
Enjoy

Saturday, June 9, 2012

{ barbie hair make-over } And giveaway winner


{Giveaway Winners}

Congratulations to the two winners of the little blue halos:

Tami Thomson
&
Jennifer Greg

Thanks for participating! If you left an email with your comment, I will contact you
via email. If not, please contact me within 48 hours to claim your halo through
my Facebook page or by email!

_____________________________________________________________________

Barbie hair make-over


Barbie is such a beauty! Silky smooth hair, big eyes, and don't forget 
the incredible wardrobe! But if you have a young girl, like I do, then Barbie's hair
is all but smooth and silky any more and and her clothes actually have to be 
washed with your laundry! 

So, Peach brought me a Barbie today and asked if I could tame her wild
mane. I was doubting my abilities momentarily. But I figured something out.. It's
not as hard as it seems! 


What you'll need:

* Liquid laundry soap (preferably with added fabric softener)
* Boiling water
* Cold water
* Cup

Sorry for the lack of pictures. 
If you can wash hair, you can fix Barbie!

Start by wetting Barbies hair.

Dip your finger tips in your liquid laundry soap and wipe through hair.

Brush soap through hair and remove all tangles.

Remove boiling water from any heat source. Dip Barbie's hair in the water and swish
it around a bit. Now pour the water over her hair slowly to remove soap.

Repeat above step in cold water.

Now brush the hair out and smooth it in place. Stand Barbie up in a cup to allow her
hair to dry completely.  


No more throwing Barbie's away for their nasty hair! :)

Friday, June 1, 2012

{ little blue halo } Giveaway

*This Giveaway Is Closed*
GIVEAWAY!!

I sat down and made a tie back halo for myself a few days ago.
It was just so cute that I went ahead a made a few more, and......
 I'm giving away 2 of them!* 
That's right, two winners! 


The giveaway will run for one week... from Friday, June 1, 2012
through Thursday, June 7, 2012 ( midnight, HST)

Halo's fit age Preemie to approximately 4 years old.

How to enter:

1. Like A Lott Of Ideas on Facebook.
Leave a comment on THIS blog post stating that you completed step 1. 
This comment will be your entry into this giveaway.
Additional ways to enter:
2. Pin this giveaway on Pinterest. Leave a comment on THIS blog post 
stating that you completed step 2.

3. Share this giveaway on Facebook. You must have a link 
back to this blog post
or A Lott Of Ideas Facebook page. Leave a comment on THIS 
blog post stating that you completed step 3

4. Follow A Lott Of Ideas blog through Google 
Friend Connect or by email. Leave a comment on THIS blog post stating
 that you completed step 4.

5. Go to Kandislei Co. on Etsy.com and find your favorite item.
 Leave a comment on THIS blog post stating what the item is and
 that you completed step 5.
Leave a comment on THIS blog post for EACH bonus entry completed stating that you completed the bonus entry and leave a link in your comment. You have 5 chances to win! Good LUCK!
*I will announce the winner on this blog as well as on Facebook.
Please check back to see if you won! Winners will be allowed 42 hours to claim
their prizes. After the 42 hours, a new winner will be chosen. If you
want to ensure your winnings, please leave an email address in your entry posts.
Winner will be chosen by Random.org.


Please note: This giveaway is NOT sponsored or associated with Facebook. There are no returns or exchanges on any of the prizes. Prizes do not have cash value.


Friday, May 25, 2012

{ pencil nameplate } teacher

The school year is over here in Hawaii! At the last minute my husband and I 
put together this nameplate for Ryker's teacher. Ms Arakaki was so wonderful!
She really dedicated herself to teaching her class and making sure that
everyone felt included and loved! What a wonderful woman!


What you'll need:

* 12" long 2x4
* Saw and sander
* Paint
* Vinyl lettering
* Jute and/ or yarn


My husband was wonderful and cut out and sanded the piece of wood for 
me! You need to cut the tip of the pencil  this shape >. Then, using a
sander ( belt sander is best) run the edge around the other end to define the eraser.


Go ahead and paint your pencil. Allow it to dry completely.

 I cut my vinyl lettering out on the Cricut. I used " Making
the Grade" Cartridge. I cut Ms. Arakaki at 1 1/2 inches. Ryker at 1 inch.

Center on your pencil and press it on.

Peel off the masking...

I put Ryker's name and the year on the bottom.

I finished off by tying some jute and textured yarn around the groove
that separates the eraser from the body of the pencil.


I wrapped a little bit of tissue paper around it.

This would be great  for a first day of school, teacher appreciation week,
or just because your child has a wonderful teacher!