Friday, February 3, 2012

{ valentine inspired banner }

I recently made a flag banner for a friend of mine. It turned out so cute
that I couldn't help but make something similar for myself! And since I haven't 
done any decorating for Valentine's Day, my theme was pretty much
chosen for me. So, without further ado.... 


What you'll need:

* Fabric
* Scissors
* Sewing machine with coordinating thread
* Paper ( to make your pattern)
* Bowl 
*  1" wide ribbon or bias tape

I started by making a pattern. I went with a half round shape instead of
the more traditional triangle. Set your bowl down on your paper
so it is right up against the bottom and one side of your paper.

Trace it here.

Now fold the paper so your circle is exactly half. My paper is
slightly transparent so I could see where I traced on the other side and
just lined it up. I've marked the top so you you can be sure of the way
I folded.
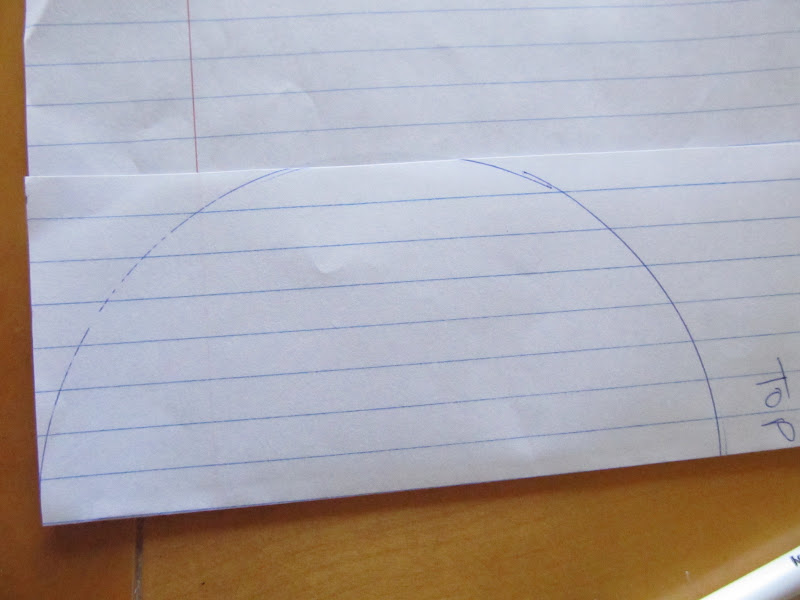
Now cut off the bottom section of your paper following your circle.

Cut straight up the edge of your paper (no longer following the
circle, but the raw edge) on the top section.

Unfold your paper. 
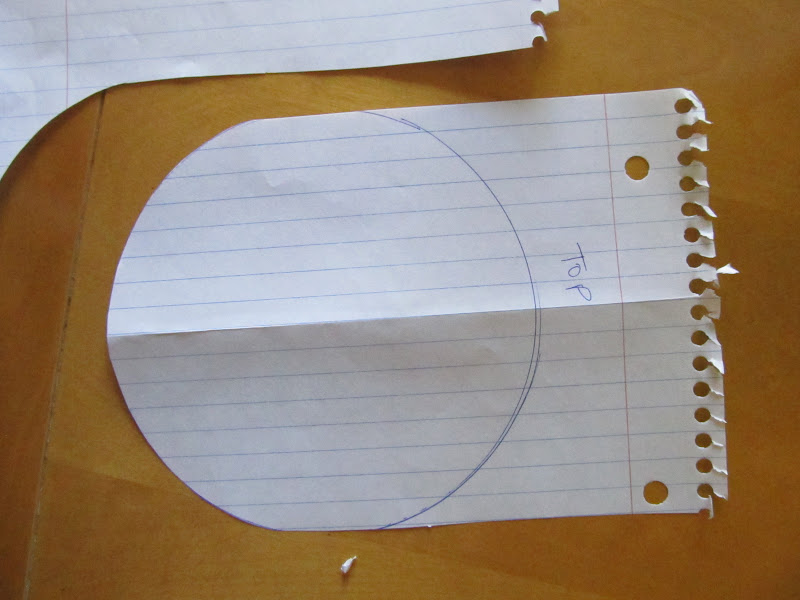
I folded down the top squared part until it looked "right". 
Then trimmed the extra straight across.
This completes your pattern.


Grab your fabric. I used 7 different fabric patterns/colors.
 I went to Wal-Mart yesterday and 
found some really cute fabric! I bought a quarter 
 yard of each fabric and that was well enough to make 5
banners this long! 

Fold your fabric in half so that the wrong sides are together. 
Pin your pattern to the fabric so you are cutting 
out two layers at a time( front and back).
Do this twice  for each piece of fabric.


Now sew the fronts to the backs of each flag. Use a zigzag top stitch so your
raw edges are still showing. Wrong sides should be 
together. Your fabric should already be paired up this way because you
cut it out this way. Clip your strings.


I added a heart on my solid pink fabric. I made a duplicate
paper pattern and folded it in half. I cut out a heart shape
from the middle.


Now you fold your fabric piece in half as well and pin the pattern
to it. Cut out the heart on the fabric.


Zigzag stitch around the heart. Take your time. It will be pretty easy
to get out of control going around those curves! Start at the top center.

Now organize your flags in the order you want them. Stack them
this way so you don't have to worry about finding the right fabric when
you start sewing them into a strip.

Fold your ribbon in half and start sewing about  12" 
from the end of your ribbon using the same zigzag stitch as before.
( this tail will be a way to tie up your banner in the end)


Add your first flag in front of your presser foot and fold the ribbon
in half over the straight edge. Hold it in place and sew down. 
Stop at the edge of the flag.

Add your second flag the same way as you did the first, leaving a 1/4 inch gap
between it and the first flag never cutting your thread.

Continue adding flags in the same manner as above until you all flags
are attached. Back stitch. Cut ribbon about 12 inches beyond the 
edge of the last flag.


Now you're done! I hung mine on the wooden shelf and used
pins and tape to hold it up! 


These are so cute to use as photography props! 


I'm seriously considering making one of these for every holiday!
They are so easy to store and easy to put up!

Enjoy!


Saturday, January 28, 2012

{ princess party hats }

I couldn't find party hats that I liked for Kaj's birthday. 
So, I improvised! 

I wanted to have an activity for the girls to do  that
wasn't just a game. So we made party hats for them to 
wear during the tea party! 

What you'll need:
* Party hat
* White paper
* Pencil & scissors
* Crayons & glitter glue
* Tape
* Strips of tulle

I bought the cheapest hats I could find. I paid less than
$2 for 8 hats (the pack came with matching bags and noise makers). 
It doesn't matter what they look like! 
You are just going to cover them up!
.

Start by opening up your party hat. Don't worry if you damage the
tab a little while opening them. You won't need the tab to put
it back together


Trace your hat onto white paper.
( you really can use what ever color you want! Pattern
paper would be so cute!)

Cut it out

Put some glue around the edge of your party hat and put
your traced piece on top.


I prepared these the night before the party. When the girls got
to the house for the party, I gave them crayons and glitter 
glue and let them decorate any way they like.


You may want to help the little ones with the glitter glue! 
It takes quite a while to dry when there are huge globs of it! :)


Once the glue is dried, add strips of tulle to the point of the hat.
Tape it onto the inside. These are just extra pieces from
a tutu I made a while ago! 

Now just roll it back up and tape it together again! 

They loved these hats! Some girls showed up a little late and
saw these hats on the other girls and couldn't wait to make their own! 


Enjoy!

Friday, January 27, 2012

{ Gradybug 3rd Birthday giveaway} and Kandislei Co. Coupon

Good morning! I want to start by welcoming any new fans sent over
from Gradybug Designs! I wish you all luck on their 3rd
Birthday giveaway!
And for those of you who don't know, Gradybug Designs is having
a big birthday giveaway! There are two prize packages to be won! Both
are filled with cute photography stuff, like backdrops, props and even
Photoshop actions! 
Kandislei Co. (my Etsy shop) is participating in the giveaway as well! One
of the lucky winners will be getting both of these crochet chullo owl hats
in there prize package!


So go on over to Gradybug Designs and enter to win! It's super easy
to enter! Just "like" all the vendors! And then you can do 3 additional enteries as 
well! Good Luck! 

And since I really love my fans and followers, I am putting on a sale in my
Etsy shop for the remainder of the giveaway! Bonus!


Just enter the coupon code above at time of purchase!

So go ahead and take advantage of all of these
deals from Gradybug designs,  Kandislei Co. and all the
other great vendors!

Enjoy and Good Luck!

Thursday, January 26, 2012

{ rosette cake }

I made Kaj's birthday cake yesterday morning in
a little bit of a rush. We made her party a few hours earlier
than we normally do them and I didn't do well adjusting! 
But I did get everything done, it was just close. :)


These rosettes are super easy! I went on YouTube and found a video
that shows the basic technique used to make them.
Here is a link to the video I learned from.

The rosette really uses a lot of frosting! This is a two layer strawberry
cake. I put a thin layer of frosting between the two cakes and
covered the whole cake with a thin layer of frosting. This used up one and
a half tubs of frosting. Then the rosettes I have here used up another full
tub! I had planned on covering the whole cake but didn't have enough
frosting!  I sprinkled it with pearl sprinkles.

Kaj was so excited that she started singing Happy Birthday first!


Look for my post on these cute party hats!

Happy 4th birthday Peach! 

Tuesday, January 24, 2012

{ heart cupcake toppers }

Cupcakes always taste better with toppers. At least I think so! 
I'm just preparing for baby girl's birthday party and needed mini cupcakes
for the tea party. I made red velvet cupcakes with cream cheese 
frosting and pearl sprinkles. I cut my hearts out of the same
paper I used on her bunting inspired invitations, here.


These are super easy. So easy in fact, that you probably don't need me
to explain how to make them! But just in case, here you go!


What you'll need:
* Paper cut outs of hearts ( two per topper)
* Toothpicks
* Glue


Cut out your shapes. Two for each topper. I used the Cricut. 

Glue the backside of your first shape.

Lay your tooth pick center on the heart

Add another heart on top. Let it dry completely.


Now add to your cupcakes! They are so cute on these mini
cupcakes! And I know the girls will love them at the 
tea party today! These would be so cute for Valentine treats
as well! 

These cupcakes were good practice for the cake! I'm
doing the frosting rosettes and I had never done them before! 


Total cost:     Free!!!