Friday, May 25, 2012

{ my heart in a jar }

My cousin pinned the cutest wedding decor idea on Pinterest the other day! 
Cute enough that I made a very similar version of it for my home decor! 
Thanks again Pinterest!

What you'll need:
* Canning jar
* 2 Book pages (or pattern paper)
* Strip of fabric
* Scissors

This is a very simple project!

Start by measuring both pieces of paper to your jar. I just set my
book pages inside and mark with a pencil about 1/8 of an inch lower than 
the top of the jar.

Cut off the excess

Sketch a heart in the center of your paper.

Cut out the heart and erase any pencil marks.

You need two pieces of paper so I just cut mine at the same time to make
sure they were the same.
Put your papers back into the jar; one in front, one in back. You 
should be able to see through both hearts.

Put the lid on and tie a strip of fabric around the top into a bow.
I like to rip my fabric instead of cutting it for that worn look.


That's it! Enjoy!


The version I saw on Pinterest had a candle in it. I do not recommend using a 
candle in my version. The paper could cause a fire hazard. 

Friday, May 18, 2012

{ cornflake candy } recipe

I've got a little recipe for all you peanut butter lovers! 
These peanut butter cornflake bars are chewy and not too sweet!
And, with only a few ingredients, it's nearly impossible to mess it up!
Even the kids can help!


Cornflake Candy

Ingredients:    
1 cup of sugar
                                  1 cup of light corn syrup (Karo brand)
                      1 cup of creamy peanut butter
     7 cups cornflakes

Start by measuring out your cornflakes. Set them aside

Mix sugar and light corn syrup in a large sauce pan over medium heat.

Make sure you keep mixing. The sugar will burn if you don't!

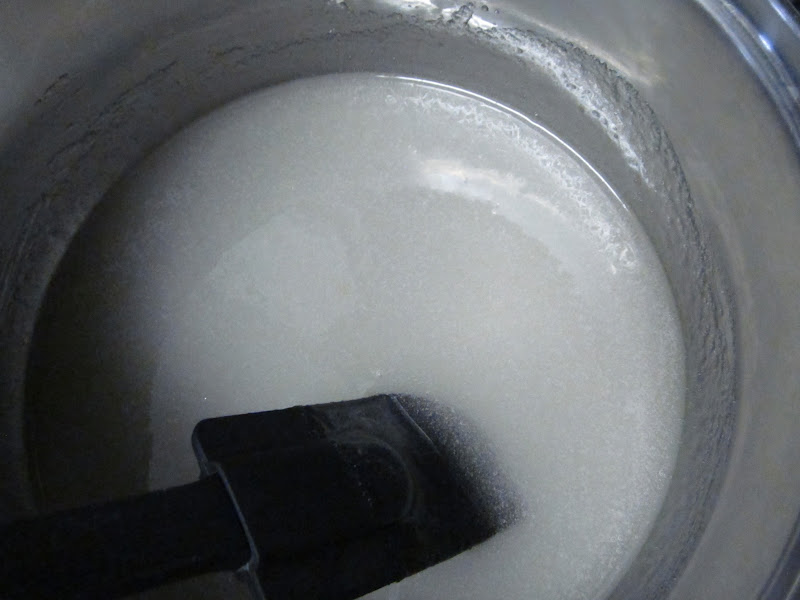
Boil sugar mixture until sugar had dissolved completely. Remove from heat

End product should be clear like so... 

Add peanut butter and mix well 


Add cornflakes to the peanut butter mixture, half cup at a time. I like
to just shake a little in the pot, mix, and repeat.

Make sure all of the cornflakes are coated. As it cools, it will harden.
So try to mix quickly and thoroughly 

Spoon mixture into a baking dish or onto a cookie sheet
lined with wax paper and press it flat to your desired thickness.

Let your Cornflake candy cool.
Cut into squares.

And eat!! 


Wednesday, May 9, 2012

{ pinwheel backdrop and decor }

I got together this weekend with some wonderful friends, all of whom are 
talented photographers! We do this occasionally and have fun
photo shoots for whatever reason! And although I cannot 
take pictures from anything but my point and shoot camera, I can do
a few other things to help the photo shoot along! :) 
I put together some pinwheels for a backdrop idea! They turned out so
cute and were a great addition to the photos! Oh but don't worry! 
They will be used beyond our weekend gathering! A few will
be added to my very own wall for decor! 


What you'll need:
* Paper (not card stock)
* Scissors
* Tape and/or hot glue
* Hole punch (optional)

I started with the big pinwheels. I used 12x12 pieces of paper. Each 
large pinwheel needs 2 pieces of paper. Start out by folding your edge back
about 1/2 inch. Turn it over and fold it back about 1/2 inch.
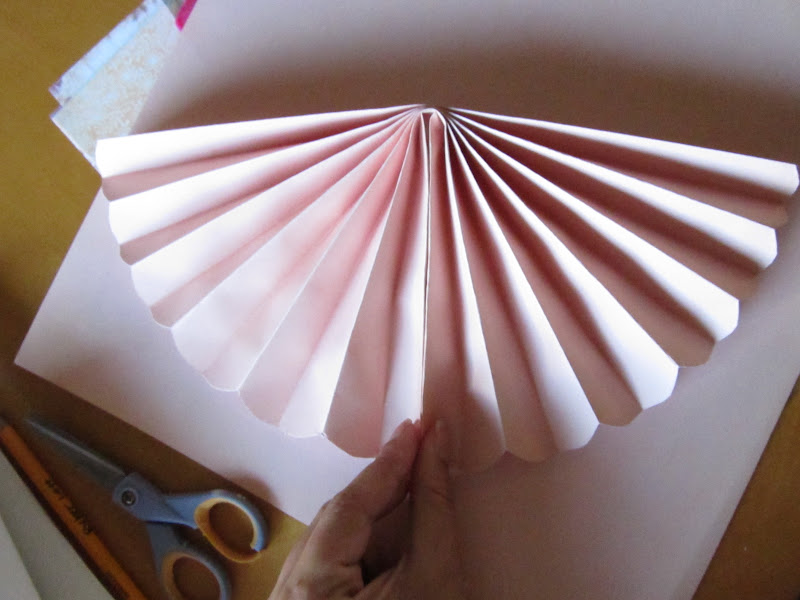
Continue folding accordion style until it is complete. Repeat
on second piece of paper.


Mark a curved line at each end of your accordion.

Cut it off. Very few of my accordions had even edges
when I was finished folding them. This gives a ruffled look
around the edge of your pinwheel and also evens out the edges.

Now would be the best time to add detail with your hole punch. Just punch
a hole through all layers on each end of your accordion!

Now fold your accordion in half.
Like so ...


Glue or tape this together

Repeat these steps on your other accordion as well.

Now tape or glue the two half together! Pinwheel complete!

When you are working with smaller pinwheels, you have to use more
pieces! For instance, I made this smaller pinwheel with 6x6 pieces of paper.
I needed 3 to get the desired look. 2 would't reach around a full circle
and 4 was a little too floppy. If you went any smaller than this, I would
recommend trying 4 pieces!


And of course I made one with a old book page! 3 was the magic number
there, too.


You can hang these with string or just tape them up to the wall! 


I love the layered look!

And a little something from the fun photo shoot! Don't you think the pinwheels
are fantastic! They just add great color and detail as a backdrop! <3
Photo by the very talented Malia Cano
Stop by her blog or website and check out her amazing work! 


Monday, April 30, 2012

{ framed heart }

I have been a little bit.. MIA! I have been so busy the last few weeks with orders
from my Etsy shop and making May Fest costumes for 3 first grade classes! 
So I finally finished all 68 costumes and didn't really want to do anything
but sit! But, yesterday, I got crafty!  I made a few things, and improved a few 
more! So I'm back! 


This is a frame makeover!
I was looking for old mason jars at the Goodwill and found
myself in the frame section. I found this little frame and 
of course I bought it for $0.99! 


What you'll need:

* Frame
*Pattern paper
*Mod Podge
* Nail file
* Strips of fabric
* Book page

First, take the glass and backing off of the frame.

Lay your frame face down on the back side of your
pattern paper. Trace your frame onto the paper.

Cut it out.

Spread a layer of Mod Podge onto the front of your frame.
Make sure you get the edges well. You don't want 
the paper to lift once it's placed on.

Place your paper on and pres it down from one side to the other.
Avoid making ripples or bubbles in the paper. They are so hard to fix!
I like to keep applying pressure by swiping my hand over
it for about a minute to make sure it has a good bond.

Use your nail file to remove the excess paper that is hanging over
the edge of your frame.

Lay your file at a 45 degree angle against the corner
of your frame. Apply pressure and pull downward.
  (If you file upward, you will most likely lift the paper from the frame.)

Your edges should be nice a flush with the frame.

After the Mod Podge has dried completely, add and layer of Mod
Podge over the top of your pattern paper to protect it. Let it dry.

Now that your frame is complete you can use your strips of fabric
to make rosettes! For my rosette tutorial, click here. You can
twist them tight or loose for a look that you love!

Hot glue them in place. 

I don't have a picture on hand that I want in this frame so here is what I did.
Cut a small square of white paper to fit your frame. Then cut a heart shape
from some pattern paper or a book page. Center it on the white square and 
glue down. Put your glass, heart and backing back in your frame once
everything has had a chance to dry!

Enjoy!

Total cost for this project: $0.99