Monday, April 30, 2012

{ framed heart }

I have been a little bit.. MIA! I have been so busy the last few weeks with orders
from my Etsy shop and making May Fest costumes for 3 first grade classes! 
So I finally finished all 68 costumes and didn't really want to do anything
but sit! But, yesterday, I got crafty!  I made a few things, and improved a few 
more! So I'm back! 


This is a frame makeover!
I was looking for old mason jars at the Goodwill and found
myself in the frame section. I found this little frame and 
of course I bought it for $0.99! 


What you'll need:

* Frame
*Pattern paper
*Mod Podge
* Nail file
* Strips of fabric
* Book page

First, take the glass and backing off of the frame.

Lay your frame face down on the back side of your
pattern paper. Trace your frame onto the paper.

Cut it out.

Spread a layer of Mod Podge onto the front of your frame.
Make sure you get the edges well. You don't want 
the paper to lift once it's placed on.

Place your paper on and pres it down from one side to the other.
Avoid making ripples or bubbles in the paper. They are so hard to fix!
I like to keep applying pressure by swiping my hand over
it for about a minute to make sure it has a good bond.

Use your nail file to remove the excess paper that is hanging over
the edge of your frame.

Lay your file at a 45 degree angle against the corner
of your frame. Apply pressure and pull downward.
  (If you file upward, you will most likely lift the paper from the frame.)

Your edges should be nice a flush with the frame.

After the Mod Podge has dried completely, add and layer of Mod
Podge over the top of your pattern paper to protect it. Let it dry.

Now that your frame is complete you can use your strips of fabric
to make rosettes! For my rosette tutorial, click here. You can
twist them tight or loose for a look that you love!

Hot glue them in place. 

I don't have a picture on hand that I want in this frame so here is what I did.
Cut a small square of white paper to fit your frame. Then cut a heart shape
from some pattern paper or a book page. Center it on the white square and 
glue down. Put your glass, heart and backing back in your frame once
everything has had a chance to dry!

Enjoy!

Total cost for this project: $0.99

Friday, March 9, 2012

{ spring subway art } free download and Kandislei Co. coupon

Do you love subway art? Me too! I threw something together last week
and finally got it printed to put up for myself! It's so cute! 


I really didn't do a lot of work on this! I used items that I made
 for Christmas and Valentines Day! I like EASY!

This bow was from my Christmas wreath. I used burlap, tulle, satin ribbon and
jute and tied it into a simple bow. I just taped it right onto the frame! 

The bunting/flags/banner was part of my Valentine wreath ( which was made from 
my Christmas wreath)! I simply glued ric rac to the top edges of triangle
 fabric pieces cut from scraps! I taped this
into place on my frame!


So here is my gift to you! You can download this subway art for free!
If you want to print this file right from your home printer, download the PDF file.
If you want to order it as a print from your local photo lab, download the JPG file! 


JPG File below:
                                                                DOWNLOAD FILE

PDF File below:
  DOWNLOAD FILE


(This image is an 8x10. If you print it as a smaller photo image, you may

loose some of the letters and words around the edges.)


Kandislei Co. Coupon

This morning, Jenna Loch Photography's 4,000 fan giveaway went live!
I'm happy to be a part of it! You can enter to win 1 of  over 40 items
including the button up hat from my Etsy shop, Kandislei Co.!
So stop by her blog and enter to win!


On top of all the FREE stuff she's offering, I'm offering 15% off
the entire shop for the duration of the giveaway by using the coupon code below!

You can take a peek
at some of the styles available by clicking on the "shop" tab at the top
of this page! So take advantage of these savings as well!
www.kandisleico.etsy.com


Have a fabulous weekend!

Wednesday, February 29, 2012

{ spring burlap banner }

Spring is such a beautiful time of year! All of my orchids are blooming, my Easter lily's 
are really close to blooming and even my banana tree is blooming! I just love all
the bright colors and especially the smell of rain! Although we get plenty of rain
here throughout the year and flowers are always blooming, 
you can definitely feel that it is 
SPRING!

I really like burlap! It has such an earthy look to it. I thought it would be perfect
for a spring banner. Plus, I figured out an easy way to prevent your burlap
from fraying on every cut! 

What you'll need:
* Burlap
* Mod Podge
* Craft paint
* Sponge dabber brush
* Scissors
* Jute
* Sewing machine with matching thread
* Cricut (optional)

Start by laying something down on your work area. I used a long piece
of plastic wrap. I  don't want my work to stick to paper or the table. 
Then lay a piece of burlap down on top.

Now dab your sponge brush into some Mod Podge and start
dabbing it onto the burlap. You want to cover the whole piece.
The more you use, the stiffer it will be! So base your thickness on how
firm you want your burlap in the end.

Allow the burlap to dry completely (even the opposite side will be damp 
with Mod Podge)!

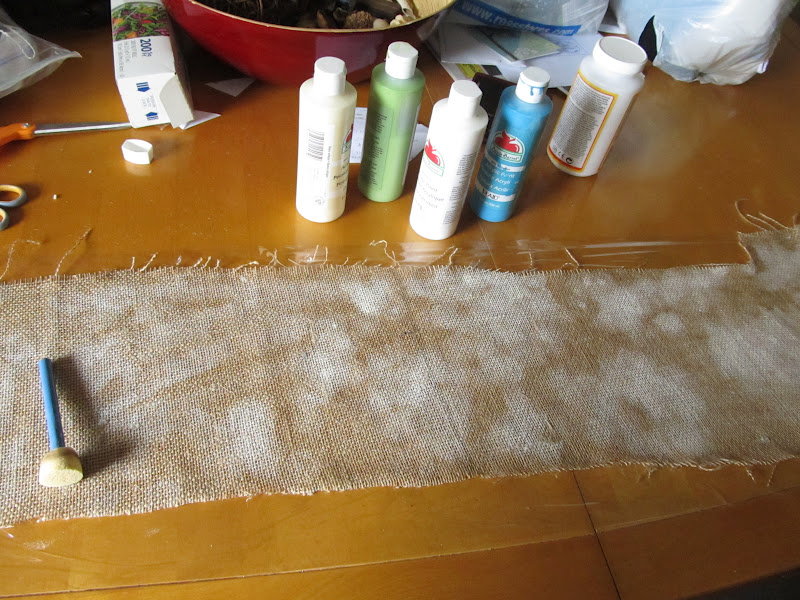
I used some white paint and dabbed a very small amount over my entire piece.
Let this dry.


Now to make a pattern for  your flags.
I used a small envelope, folded it in half, and cut off the corner.


 Now cut out your flags, using your pattern.


Using your Cricut, cut out your letters and shapes on some scrap paper.
I used George and basic shapes cartridge.

Now use the outside piece like a stencil. Dab the color of your
choice onto each flag

Make sure you keep the inside of the 'P' and 'R'  so you can hold them
into place while you paint.

If you don't have a Cricut, you can use a paintbrush to paint your letters on!
Let the paint dry completely.

I added a vintage button on the center of each flower as well.

Now it's time to put the flag together. Lay the flags out in the 
order they will be attached to avoid sewing them on wrong.

Line your jute up in the center of your pressure foot over the top of your flag.
Using a wide zigzag stitch on the sewing machine you sew the jute
down the top of each flag, adding the next flag without stopping or cutting
thread.

Make sure you leave a long end on the jute for tying off your banner.

And your done! 


Wednesday, February 22, 2012

{ squiggly bracket picture frame }

I recently saw some frames online that were so dang cute! No plain old 
square frames either! They were frames that obviously were inspired
by the squiggly bracket! 

(I'm not sure who named it that
but I love it! hahah  squiggly bracket -->  {  })

I just switched out my family photo and I thought about painting the
frame (I'm trying to get away from all the black). Then I decided
to just make my own squiggly bracket frame; Jumbo sized! 


I just used my 20 X 30 picture frame and built a frame around it! Pretty
simple for the outcome!

What you'll need:
* Old frame
* Tape measure
* 1x4 inch board ( length depends on the size of your frame)
* Saw
* Craft paper and pencil
* Sand paper
*  Router
* Wood glue
* Wood clamps
* Paint and brush

Start with your old frame. 

Sorry for the lack of photos .... But you will use these measurements 
and mark it on your 1x4. 2 of each. Then cut them at a 45 degree angle.
The measurement will be the short end of your 45 degree angle.


Now you should have 4 piece total that look like this ( 2 measuring
the same as side and 2 measuring the same as bottom of frame). They should be able
to sit nicely around the outside of your original frame with all corners
and angles touching flush.

Now to add your detail! I used craft paper and cut out patterns that looked
just like the image above. I folded it in half and then drew a design. When you cut it
out you will have a symmetrical design. (I made different designs for 
bottom and side. You can use the same if you want). I then traced this pattern
onto my wood and cut it out with the scroll saw.


By taping your pattern together at the corners, you can make a nice clean
transition at your joint. Match up your corners to make sure they
match up and sand them down if they don't.


Next step is to router all the outside edges.
There are so many different bits available for the router.


Sand any rough edges.

Now it's time to put this thing together. Remove your picture, glass and backing from
the original frame if you haven't already done so.
Using wood glue and clams, attach the new frame to the outside of the old one.
I did two sides at a time because I didn't have enough clamps to do it all at once.


Allow the glue to dry completely before removing the clamps.

Now you can paint and sand as you please! 
Just make sure it's completely dry before putting your photo back in!


Cost:  $10