I recently made a flag banner for a friend of mine. It turned out so cute
that I couldn't help but make something similar for myself! And since I haven't
done any decorating for Valentine's Day, my theme was pretty much
chosen for me. So, without further ado....
What you'll need:
* Fabric
* Scissors
* Sewing machine with coordinating thread
* Paper ( to make your pattern)
* Bowl
* 1" wide ribbon or bias tape
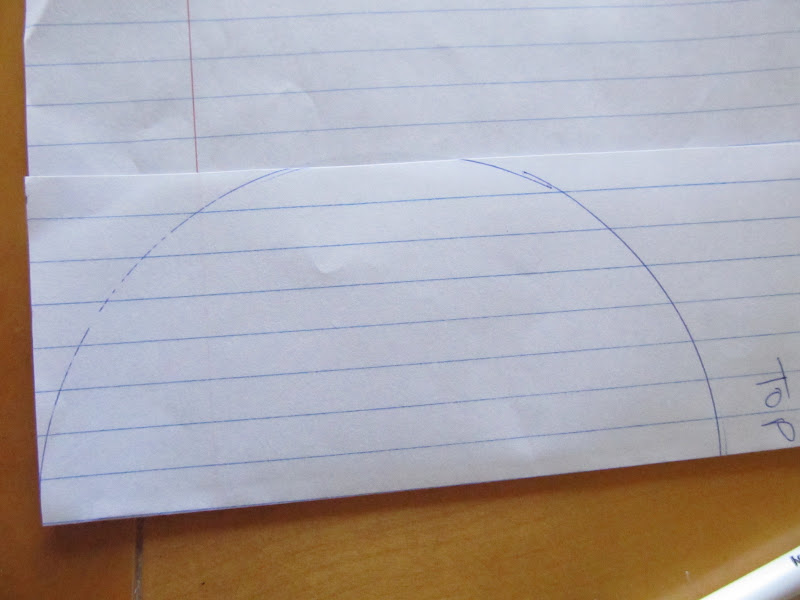
I started by making a pattern. I went with a half round shape instead of
the more traditional triangle. Set your bowl down on your paper
so it is right up against the bottom and one side of your paper.
Now fold the paper so your circle is exactly half. My paper is
slightly transparent so I could see where I traced on the other side and
just lined it up. I've marked the top so you you can be sure of the way
I folded.
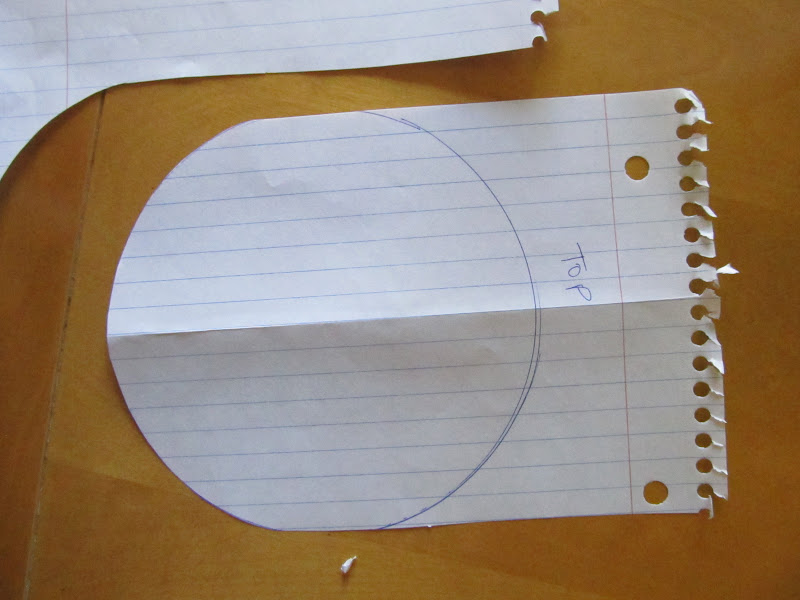
Now cut off the bottom section of your paper following your circle.
Cut straight up the edge of your paper (no longer following the
circle, but the raw edge) on the top section.
Unfold your paper.
I folded down the top squared part until it looked "right".
Then trimmed the extra straight across.
This completes your pattern.
Grab your fabric. I used 7 different fabric patterns/colors.
I went to Wal-Mart yesterday and
found some really cute fabric! I bought a quarter
yard of each fabric and that was well enough to make 5
banners this long!
Fold your fabric in half so that the wrong sides are together.
Pin your pattern to the fabric so you are cutting
out two layers at a time( front and back).
Do this twice for each piece of fabric.
Now sew the fronts to the backs of each flag. Use a zigzag top stitch so your
raw edges are still showing. Wrong sides should be
together. Your fabric should already be paired up this way because you
cut it out this way. Clip your strings.
I added a heart on my solid pink fabric. I made a duplicate
paper pattern and folded it in half. I cut out a heart shape
from the middle.
Now you fold your fabric piece in half as well and pin the pattern
to it. Cut out the heart on the fabric.
Zigzag stitch around the heart. Take your time. It will be pretty easy
to get out of control going around those curves! Start at the top center.
Now organize your flags in the order you want them. Stack them
this way so you don't have to worry about finding the right fabric when
you start sewing them into a strip.
Fold your ribbon in half and start sewing about 12"
from the end of your ribbon using the same zigzag stitch as before.
( this tail will be a way to tie up your banner in the end)
Add your first flag in front of your presser foot and fold the ribbon
in half over the straight edge. Hold it in place and sew down.
Stop at the edge of the flag.
Add your second flag the same way as you did the first, leaving a 1/4 inch gap
between it and the first flag never cutting your thread.
Continue adding flags in the same manner as above until you all flags
are attached. Back stitch. Cut ribbon about 12 inches beyond the
edge of the last flag.
Now you're done! I hung mine on the wooden shelf and used
pins and tape to hold it up!
These are so cute to use as photography props!
I'm seriously considering making one of these for every holiday!
They are so easy to store and easy to put up!
Enjoy!