I got together this weekend with some wonderful friends, all of whom are
talented photographers! We do this occasionally and have fun
photo shoots for whatever reason! And although I cannot
take pictures from anything but my point and shoot camera, I can do
a few other things to help the photo shoot along! :)
I put together some pinwheels for a backdrop idea! They turned out so
cute and were a great addition to the photos! Oh but don't worry!
They will be used beyond our weekend gathering! A few will
be added to my very own wall for decor!
What you'll need:
* Paper (not card stock)
* Scissors
* Tape and/or hot glue
* Hole punch (optional)
I started with the big pinwheels. I used 12x12 pieces of paper. Each
large pinwheel needs 2 pieces of paper. Start out by folding your edge back
about 1/2 inch. Turn it over and fold it back about 1/2 inch.
Continue folding accordion style until it is complete. Repeat
on second piece of paper.
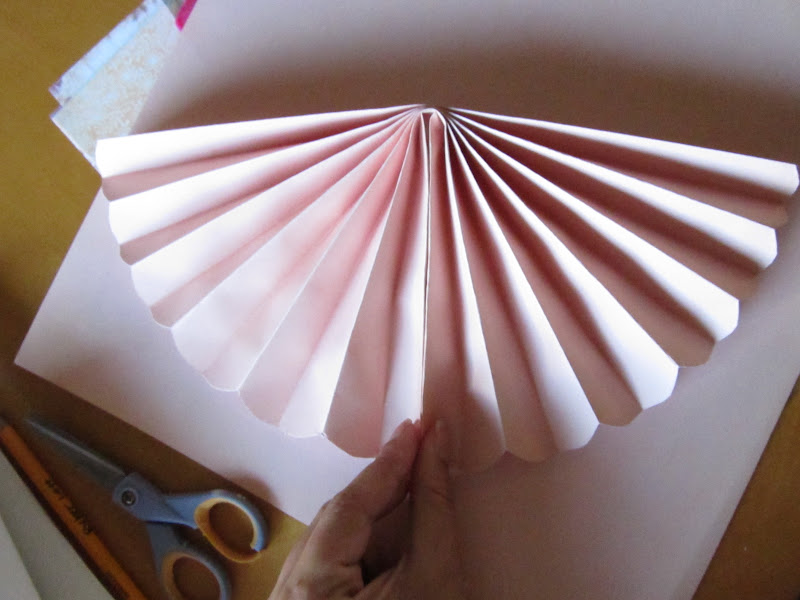
Mark a curved line at each end of your accordion.
Cut it off. Very few of my accordions had even edges
when I was finished folding them. This gives a ruffled look
around the edge of your pinwheel and also evens out the edges.
Now would be the best time to add detail with your hole punch. Just punch
a hole through all layers on each end of your accordion!
Now fold your accordion in half.
Like so ...
Glue or tape this together
Repeat these steps on your other accordion as well.
Now tape or glue the two half together! Pinwheel complete!
When you are working with smaller pinwheels, you have to use more
pieces! For instance, I made this smaller pinwheel with 6x6 pieces of paper.
I needed 3 to get the desired look. 2 would't reach around a full circle
and 4 was a little too floppy. If you went any smaller than this, I would
recommend trying 4 pieces!
And of course I made one with a old book page! 3 was the magic number
there, too.
You can hang these with string or just tape them up to the wall!
I love the layered look!
And a little something from the fun photo shoot! Don't you think the pinwheels
are fantastic! They just add great color and detail as a backdrop! <3
Stop by her blog or website and check out her amazing work!