Showing posts with label craft. Show all posts

Thursday, October 11, 2012

{ fall leaves art } kids project

I remember as a child, my mother would take my brothers and I into the canyon
and let us pick out all the fall leaves we could carry. They were beautiful reds, 
oranges, and yellows. We would bring them home and glue them onto paper in any
way our hearts desired. 


We don't necessarily have fall here in Hawaii. For the most part, everything
stays nice and green. Fall is definitely different for my kids than it was for me.
My mother sent a box for the kids last week and it was full of fall leaves! I was so 
excited to share a childhood tradition with my own kids. 

What you'll need:
* fall leaves
* white school glue
* white paper

Simply glue the leaves onto the paper!


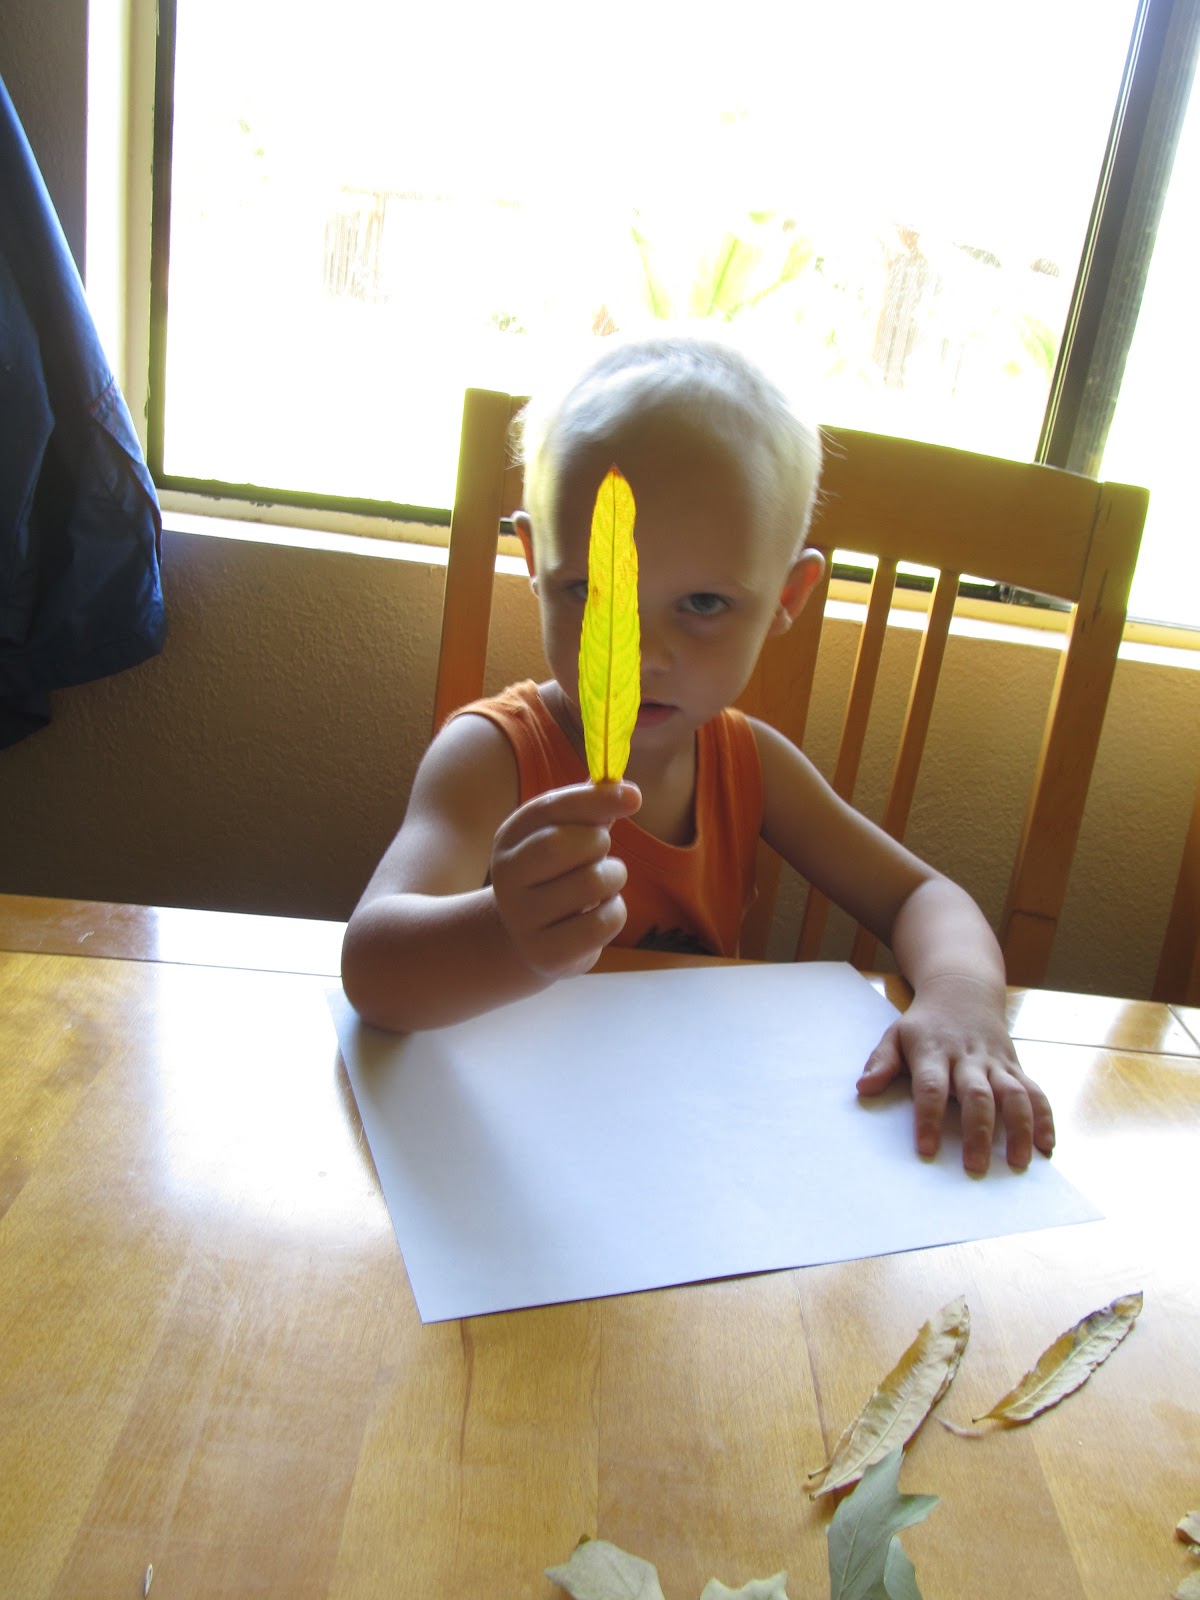
At first all 3 of my kids were a little sceptical about what they were supposed to do. But
once they got a leaf on the paper, they were ready to do their "project". 
It was a lot of fun. They loved sharing with Daddy when he got home from work as well!


This is a fun family project you can do with the kids over the weekend!

Friday, May 25, 2012

{ pencil nameplate } teacher

The school year is over here in Hawaii! At the last minute my husband and I 
put together this nameplate for Ryker's teacher. Ms Arakaki was so wonderful!
She really dedicated herself to teaching her class and making sure that
everyone felt included and loved! What a wonderful woman!


What you'll need:

* 12" long 2x4
* Saw and sander
* Paint
* Vinyl lettering
* Jute and/ or yarn


My husband was wonderful and cut out and sanded the piece of wood for 
me! You need to cut the tip of the pencil  this shape >. Then, using a
sander ( belt sander is best) run the edge around the other end to define the eraser.


Go ahead and paint your pencil. Allow it to dry completely.

 I cut my vinyl lettering out on the Cricut. I used " Making
the Grade" Cartridge. I cut Ms. Arakaki at 1 1/2 inches. Ryker at 1 inch.

Center on your pencil and press it on.

Peel off the masking...

I put Ryker's name and the year on the bottom.

I finished off by tying some jute and textured yarn around the groove
that separates the eraser from the body of the pencil.


I wrapped a little bit of tissue paper around it.

This would be great  for a first day of school, teacher appreciation week,
or just because your child has a wonderful teacher! 


Tuesday, February 14, 2012

{ valentine cootie catcher }

I've procrastinated once again!
Yesterday, I decided to add a little extra to the Valentine goody
bags that Ryker is taking to school. It was a last minute idea and I
just couldn't shake it off! I made one for Ryker and he was so pleased with it
that I went ahead and made more in a very tight time schedule! 

Remember these from grade school? 
Cootie catchers, right? I made a bunch of them
that were Valentine themed. Ryker loved them. He is 
really excited to show his friends how to use them!


What you'll need:
 
* Paper
* Pen
* Printer
* Scissors or paper cutter
* Origami skills (lol)

I started out by folding up one of these cootie catchers on a white
piece of paper. I used 12x12 pattern paper for the finished
product so I cut my white paper to a 6x6 inch size so 4 will fit nicely
on each piece of pattern paper.

I thought everyone knew how to fold these. But my brother says he never
made one! Maybe it was a girl thing? I don't remember.... so here are instructions
on folding up your cootie catcher!

6x6 inch paper

Fold in half diagonally
Open; fold diagonally the opposite direction

open

Fold corner in until point touches the center.

Repeat on all four corners.

Turn over

Fold corner into the center

Repeat on all four corners.


Fold in half 

Put your finger between these flaps

pull out on all four flaps.


That's it!

 Now you're ready to write on it! 


I scanned this onto the computer and opened it into 
a photo editing program. I added a transparent layer and then
 simply typed all of these words in
different fonts and then set them directly over the area I
wrote it. When I was done, I just removed this image. 

This is the finished image.

Now cut your 12 x 12's down to (4) 6 x 6's.


I opened my image in Microsoft Word and set my paper size to
6 x 6 inches. Now print!

And fold! 


{ Happy Valentine's Day! }

Friday, October 21, 2011

{ cylinder vase cover }

Here is an easy way to change up the look of
a simple cylinder vase. I'm sorry but I don't have
picturesof it being made!
 But I'll explain the best I can with
the photos I have!

What you'll need:
  1. glass cylinder vase
  2. pattern fabric and coordinating felt
  3. coordinating fringe
  4. hot glue
Start with your cylinder vase.

Wrap your fabric around it and cut
it down to size. You want to leave about
a quarter inch extra on top and bottom to
wrap over. Glue into place.

Now fold the top and bottom over and glue into
place.

Glue a felt circle to the bottom of the vase.
 

Now glue your fringe around the top of the vase!


 You can put something in the vase but I chose not to!