I've procrastinated once again!
Yesterday, I decided to add a little extra to the Valentine goody
bags that Ryker is taking to school. It was a last minute idea and I
just couldn't shake it off! I made one for Ryker and he was so pleased with it
that I went ahead and made more in a very tight time schedule!
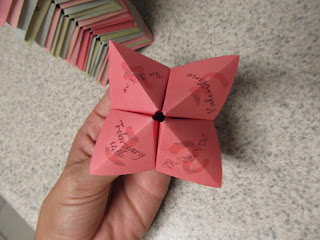
Remember these from grade school?
Cootie catchers, right? I made a bunch of them
that were Valentine themed. Ryker loved them. He is
really excited to show his friends how to use them!
What you'll need:
* Paper
* Pen
* Printer
* Scissors or paper cutter
* Origami skills (lol)
I started out by folding up one of these cootie catchers on a white
piece of paper. I used 12x12 pattern paper for the finished
product so I cut my white paper to a 6x6 inch size so 4 will fit nicely
on each piece of pattern paper.
I thought everyone knew how to fold these. But my brother says he never
made one! Maybe it was a girl thing? I don't remember.... so here are instructions
on folding up your cootie catcher!
 |
| 6x6 inch paper |
 |
| Fold in half diagonally |
 |
| Open; fold diagonally the opposite direction |
 |
| open |
 |
| Fold corner in until point touches the center. |
 |
| Repeat on all four corners. |
 |
| Turn over |
 |
| Fold corner into the center |
 |
| Repeat on all four corners. |
 |
| Fold in half |
 |
| Put your finger between these flaps |
 |
| pull out on all four flaps. |
 |
| That's it! |
Now you're ready to write on it!
I scanned this onto the computer and opened it into
a photo editing program. I added a transparent layer and then
simply typed all of these words in
different fonts and then set them directly over the area I
wrote it. When I was done, I just removed this image.
This is the finished image.
Now cut your 12 x 12's down to (4) 6 x 6's.
I opened my image in Microsoft Word and set my paper size to
6 x 6 inches. Now print!
And fold!
{ Happy Valentine's Day! }


No comments:
Post a Comment